I'm finding that the fit of the various top pieces, the slots and tendons are very tight. I'm having to lightly sand the tendons wherever I dripped a little varnish on them. My car didn't squeak as it went down the road. I hope it doesn't after I get it back together with the new top. I'll have to order another 400+ new stainless steel screws again... Each slat requires at least 20 screws as there are 8 cross members and the front and back to attach to with 2 screws each. Originally the slats were nailed with spiral nails.
I've decided to keep the patina on the wood for the most part. The patina on the slats not so much. The original 4 slats appear to have been stained dark. I managed to match the new slat color by using two stains, a darker stain on top of a lighter stain. The original slats were quarter sawed basswood. The new ones I made are maple. Don't know where to get quarter sawed basswood. Not much grain on the maple.
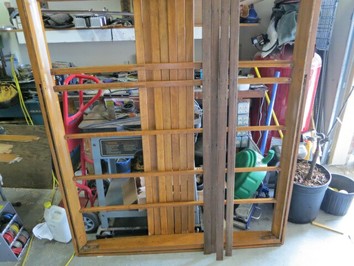
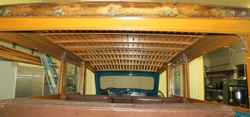
Roof removed to replace all the slats. Got some re-finishing to do.
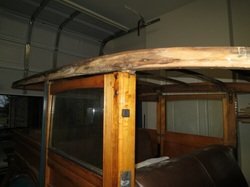
Was able to save the roof gutters by using a hacksaw to cut off the nails. Probably put them back on with #6 stainless screws
I'm also getting it back together after the paint job.
Was able to save the roof gutters by using a hacksaw to cut off the nails. Probably put them back on with #6 stainless screws
I'm also getting it back together after the paint job.
The wood around the outside top of the roof, one small piece has some rot.
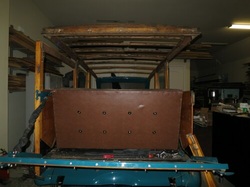
The roof structure with outside rounded pieces removed. The wood is pretty damp but little rot. I'll need to let it dry out before putting the rounded pieces back on. The damp had been there quite a while as I've had it for 2 years and I've never driven it in the rain
The roof structure with outside rounded pieces removed. The wood is pretty damp but little rot. I'll need to let it dry out before putting the rounded pieces back on. The damp had been there quite a while as I've had it for 2 years and I've never driven it in the rain
The wood around the outside top of the roof, one small piece has some rot
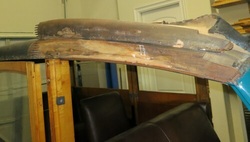
Here is the one piece of rotten wood I have to fix above the passenger door:
I'm intending to cut out the rotten part and patch in some new wood using my biscuit jointer.
I'm intending to cut out the rotten part and patch in some new wood using my biscuit jointer.
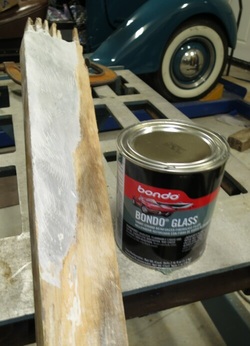
I've filled in some non structural rot holes with fiberglass re-enforced bondo. It looks more like thick fiberglass resin with fiberglass strands than bondo.
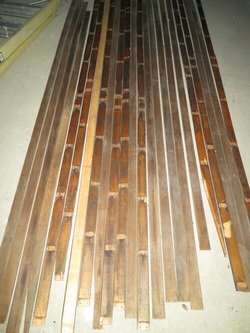
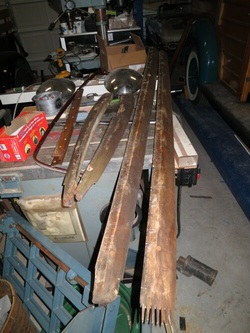
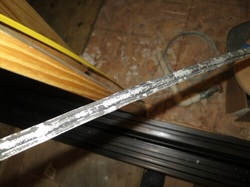
The old slats
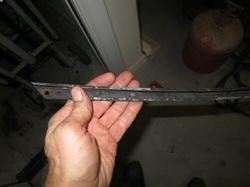
Was able to save the roof gutters by using a hacksaw to cut off the nails. Probably put them back on with #6 stainless screws
Interesting piece that was across the top of the windshield also aluminum and it is nailed to the wood and then folded over the nails.
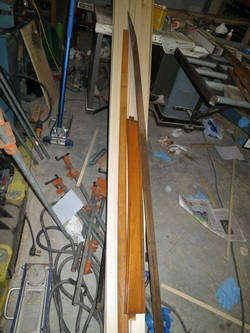
I got the new roof slats made out of maple, about 30 of them so I have a few extra. I ripped up some 15/16 inch maple to width I've been hoarding and then book matched them in two on a bandsaw. Then thru the planer they went, repeatedly. Still am waiting on a beading router bit to round over the edges.
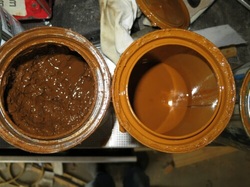
I also brought one of the panels to a paint store and they matched some stain for me. Nice match. The newly stained one is on the left is a practice stain on a bad slat and the old one on the right.
The old slats are quarter sawn wood. Looks like old growth fir to me but probably basswood. And looks like they were stained dark as they are very dark on the top under the canvas. All the top ribs and slats looked pretty dark and discolored to me. The old ribs had lots of cracked/checked black varnish on them. The slats looked like they were stained and not varnished. The new slats will match the outside wood in color and be varnished. I'll freshen up the old ribs to match as well. The restored woodies I've seen all have had the slats match the outside wood. Apparently not according to Henry. And not according to me either. I don't obsess over 100% originality. Guy that sold me the car thought the roof was original. The slats look original to me and the canvas/vinyl might also be, who knows!
I'm finding that the fit of the various top pieces, the slots and tendons are very tight. I'm having to lightly sand the tendons wherever I dripped a little varnish on them. My car didn't squeak as it went down the road. I hope it doesn't after I get it back together with the new top. I'll have to order another 400+ new stainless steel screws again... Each slat requires at least 20 screws as there are 8 cross members and the front and back to attach to with 2 screws each. Originally the slats were nailed with spiral nails.
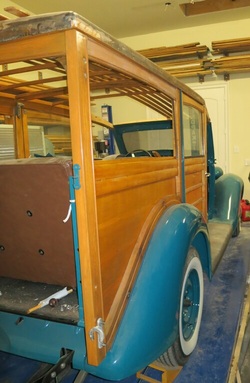
Put it back together for a test fit:
Top back together

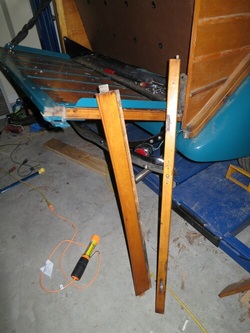
Also have fixed one of the tailgate posts. The one on the right still has the rabbit someone cut for hinges or ? that are awfully ugly. I took the post off and ripped about 1/4 inch off the edge and replaced it with some thin maple and then stained to match on the left. The match is looking pretty good to me. I had to use a little technique to get the right color. Wipe off too much stain and the color goes away. So I painted it on and let it half dry and then carefully smoothed it out. I lost some grain but got the color right. The old growth maple didn't have much grain anyway. I was very careful to drill a hole in the new edge and glue it aligned with the old latch hole. I want it to fit like before I took it off!
The rear corner post had a very ugly rabbit for something not there anymore. I sliced off about 1/4 inch and laminated a new piece on the back of it, then matched the patina. I sliced off where you can see the hole for the tailgate bracket. I also found broken off tendons at the bottom of the corner post. I ground the tendon out and will fit a new wooden one and bed it in with fiberglass re-enforced bondo. One corner post had some old missing wood which I will also repair. Also
The rear corner post had a very ugly rabbit for something not there anymore. I sliced off about 1/4 inch and laminated a new piece on the back of it, then matched the patina. I sliced off where you can see the hole for the tailgate bracket. I also found broken off tendons at the bottom of the corner post. I ground the tendon out and will fit a new wooden one and bed it in with fiberglass re-enforced bondo. One corner post had some old missing wood which I will also repair. Also
Piece above the tailgate. I considered making a new one that is straight across so I can add a rear window with a piano hinge. Decided not to.
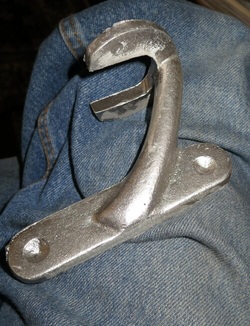
I'll also take the opportunity to install a matching right hand taillight as the one on there doesn't match. I bought a new rough aluminum casting.
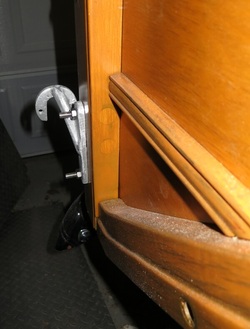
My matching right hand tail light bracket. The old bracket didn't match and had two holes drilled in the back of the corner post. I put plugs in the old mounting holes. Happily matching brackets are reproduced as an aluminum rough casting.
